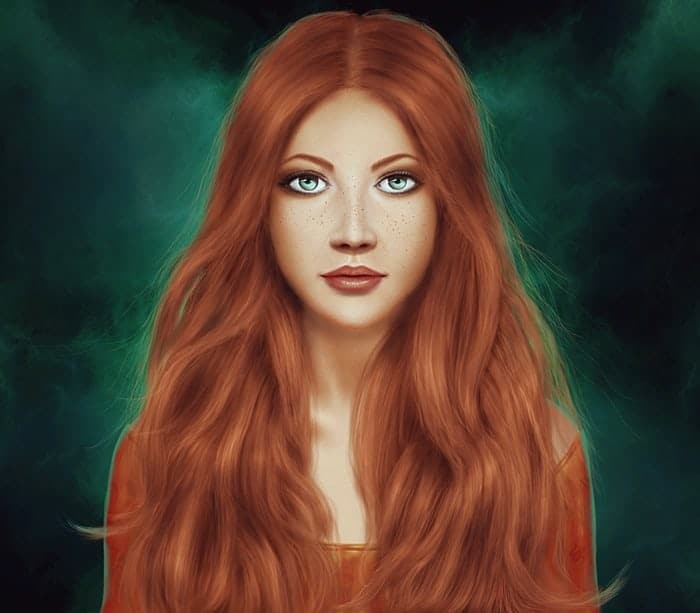
In this tutorial I’ll show you how to paint a woman portrait from scratch. You’ll learn some basic rules to form your painting, the tips to paint effectively, how to use brush and take care of the details. A graphic tablet is highly recommended for this tutorial.
What you’ll be creating
We’ll start this tutorial by learning something basic of female face anatomy to define the base of our painting. After creating the base of the head we’ll go more for the details of the face, hair, body and dress. Later we’ll use a few adjustment layers to make the color stand out. Finally we’ll refine some details to complete the process. You can use any versions of Photoshop to follow this tutorial.
Tutorial Resources
Step 1
Create a new document in Photoshop with the given settings:
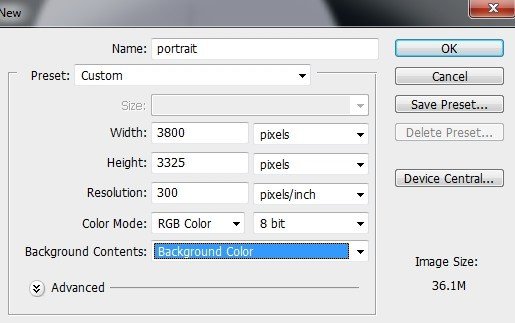
The background color should be black.
It’s very important to work on a large canvas so you can pay attention to the details.
Step 2
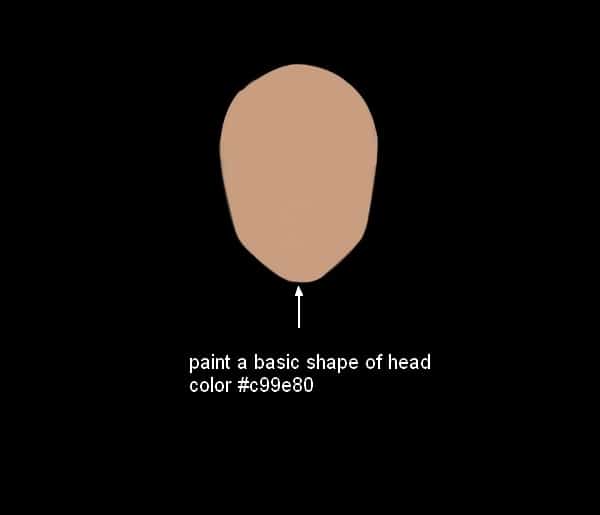
Create a basic shape of the head using a basic, hard brush with the color #c99e80 on the upper section of the black canvas.
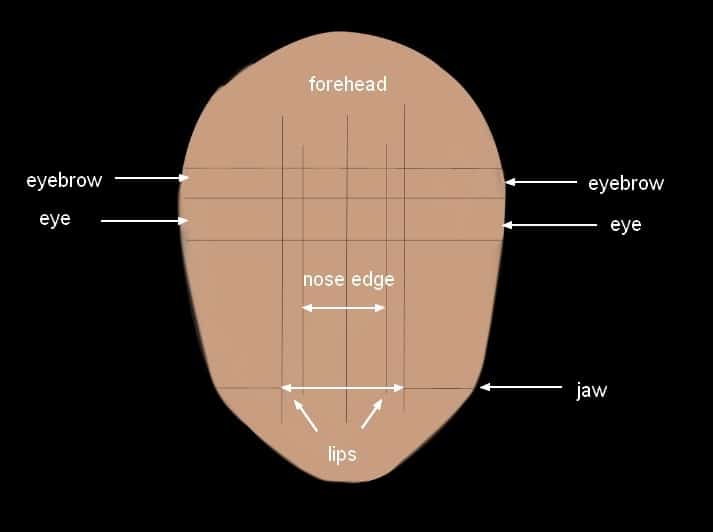
Before detailing it you should know something basic of female anatomy, especially if you don’t use any specific photo references. Every human head is different but here are something in general to remember if you’re going to paint a portrait from a frontal view with a straight look (not smiling):
– The nose length should be about 1/2 of the part counted from the highest point of the nose to the lowest point of the chin.
– The edges of the nostril should reach as far as the inner edges of the eyes.
– The lowest part of the nose should be in-line vertically with the lowest part of the cupid’s bow.
– The edges of the mouth ( the lips corners) should be lined-up horizontally with the jaw and vertically with the edges of the irises.
– The mouth is always larger than the width of the nostril edges except you want to draw a child portrait.
If you want to draw a portrait from different looks and sides, some rules above will change.
Draw some lines to define the basic parts of the head and make sure that everything is as proportional as possible. We don’t paint the ears in this tutorial as they will be covered by the hair. Place this layer above all other layers and we’ll be using them as a guidance .
Step 3
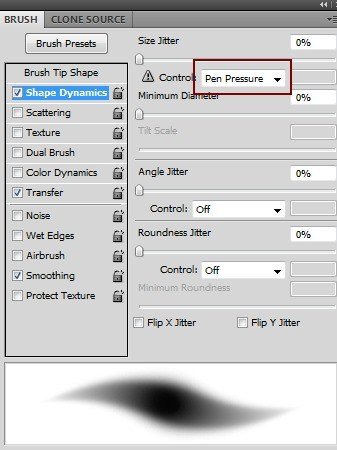
Make a new layer and change the settings for the brush as shown below (press F5):
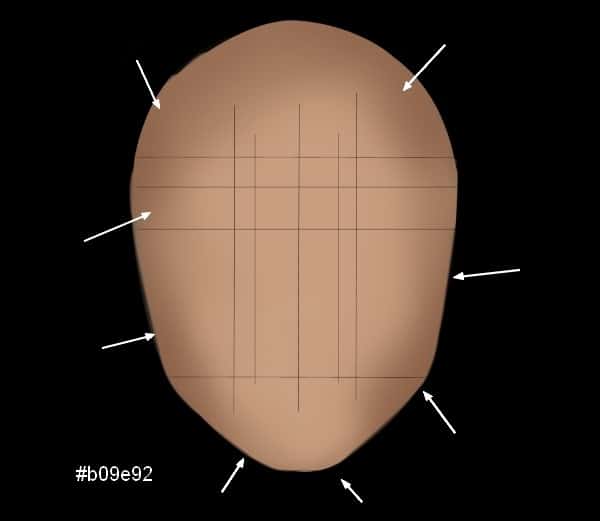
Change the foreground to #b09e92 and start to paint some shade on the face. It’s very important to define the light source in the very first time so you can paint properly later. In this case I tend to make light come straight in the front.
Step 4
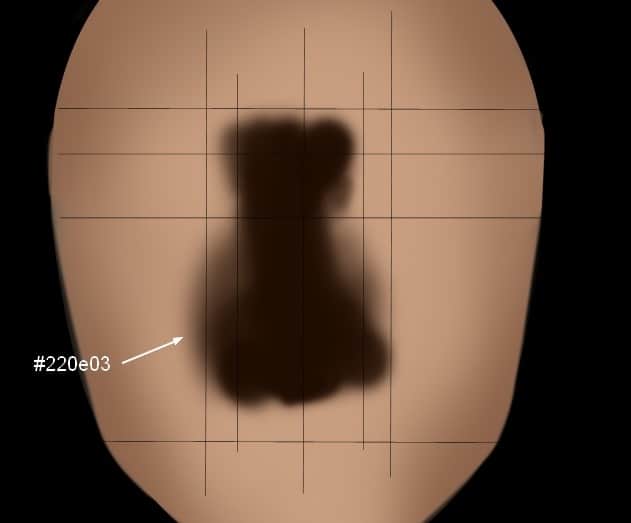
Create a new layer and use a soft brush with the color #220e03 to paint in the middle of the face. We’ll correct it so don’t worry if it looks rough.
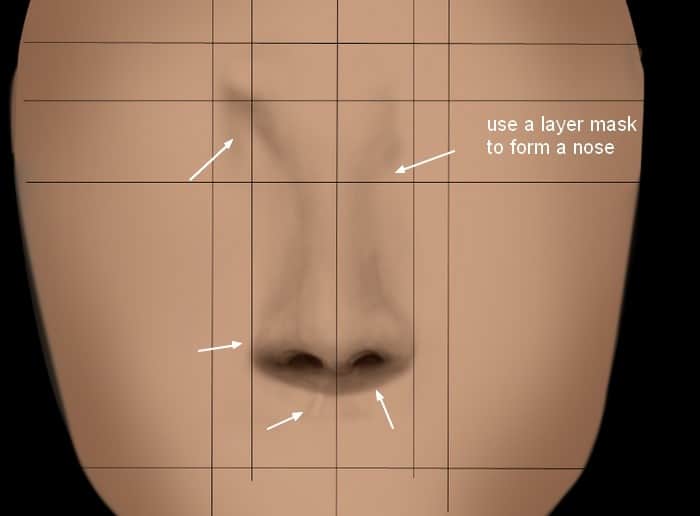
Click the second button at the bottom of the Layer Panels to add a mask to this layer. Use a brush with the hardness varied from 20% to 70%, the opacity and flow about 20 and 30% to define a nose form using the lines drawn in the step 2 as a guidance.
Step 5
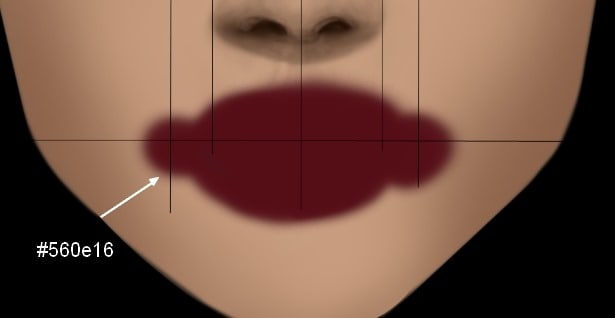
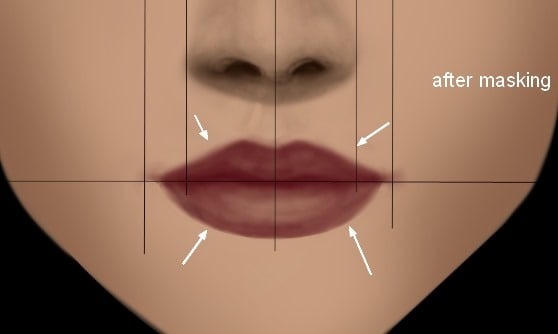
Paint with the color #560e16 under the nose and use a layer mask to define the lips base with some details. You should vary the opacity and flow of the brush to make the light and shade of the lips:
Step 6
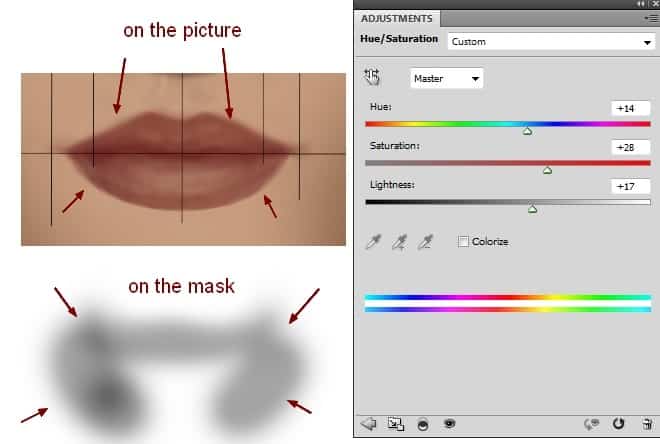
I used a Hue/Saturation adjustment layer with Clipping Mask to lighten the look of the lips. On this layer mask use a soft black brush with a very low opacity to reduce the Hue/Saturation effect :
Step 7
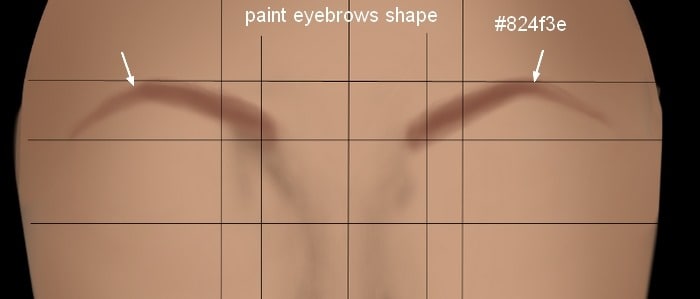
On a new layer I painted the eyebrows shape. I wanted to paint a red hair for the model so I chose a pretty dark red for the eyebrow (#824f3e), remember to make the brow ends faded to create a finer look for the face.
Step 8
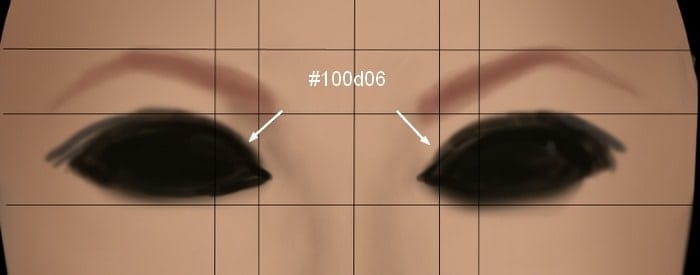
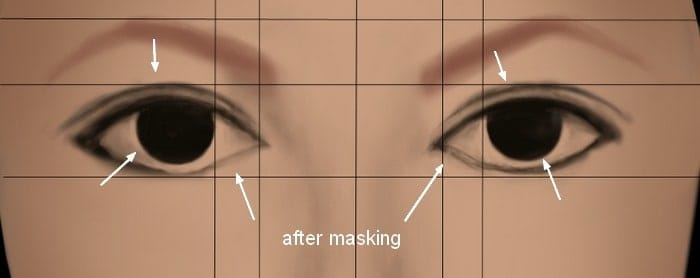
On two new layers I used a brush with the color #100d06 to paint under the eyebrows, on the indicated area of the eyes in the step 2. Then I used a layer mask to create the base of the eyes included the irises and eyelids:
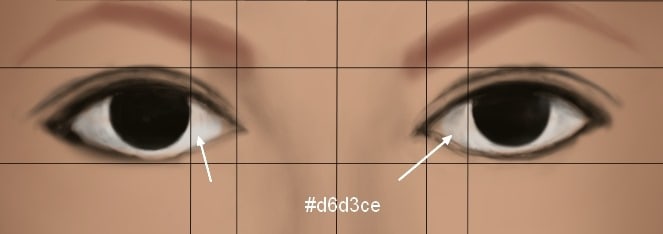
I made a new layer under the eyes ones and used a light color for the brush (#d6d3ce) to paint the sclera, remember to lower the brush opacity to make some eyes veins and details inside visible:
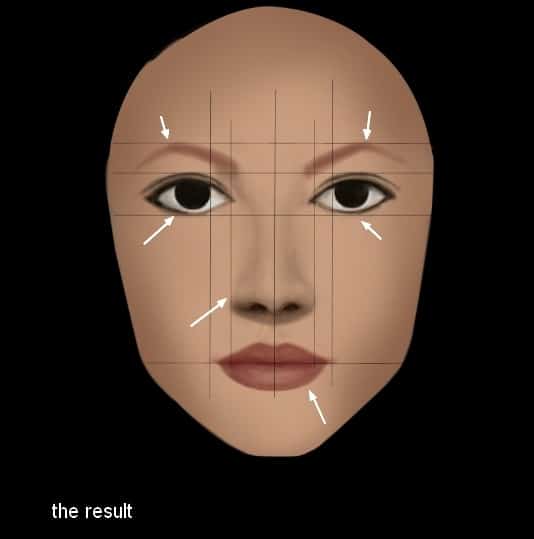
Here is the result should be so far:
Step 9
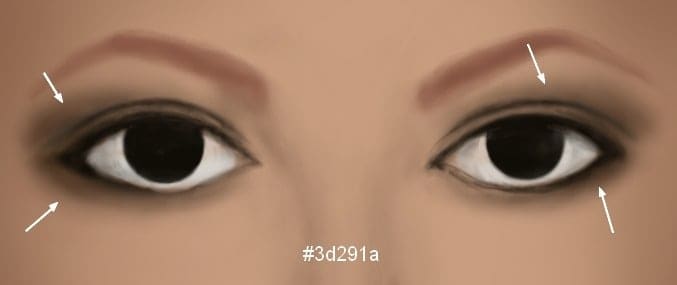
Since this step we’ll go for more details. Delete the lines as we don’t need them anymore. We’ll start from the eyes as it’s my favorite part. On a new layer under the sclera one use a soft brush with the color #3d291a to paint around the eyes, especially the eyes end to create more depth for them.
Step 10
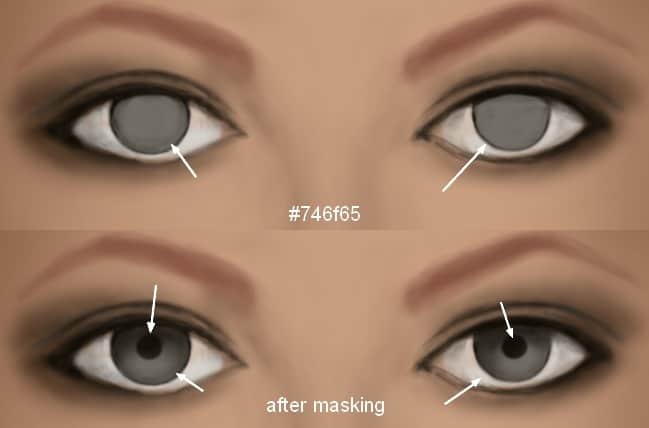
Create a new layer and on this use a brush with the color #746f65 to paint inside the irises. Add a mask to this layer and use a black brush to make the pupils and the details inside the irises visible. The pupils should be in the middle of the irises as she is looking straight at us. Also make the top of the irises less visible, less bright as there is the shadow of the eyelids:
Step 11
Make a new layer and use a hard brush with the color #e9e4d7 to paint small lines around the pupils to create more details inside the irises:
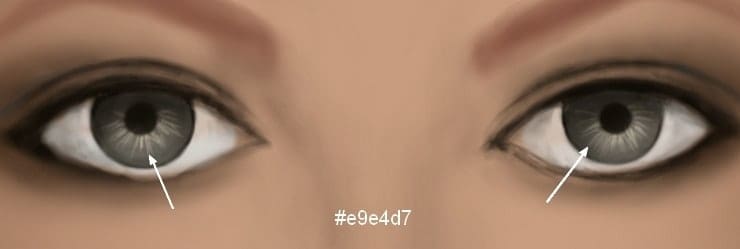
I used the same brush but lowered its hardness to 0% to paint under the irises bottom to make them brighter:

On a new layer, use the same brush to paint on the bottom right of the irises to make the light there stronger. Change this layer mode to Overlay 100%:

Step 12
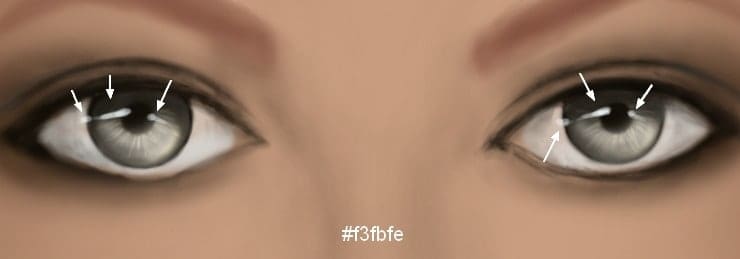
I used a new layer with a hard brush and the color #f3fbfe to make reflection in her eyes. The reflection can be anything so you’re free to paint as you see fit.
Step 13
Make a new layer, use a soft brush with the color #beb0a6 to paint more details at the bottom of the eyes:

Step 14
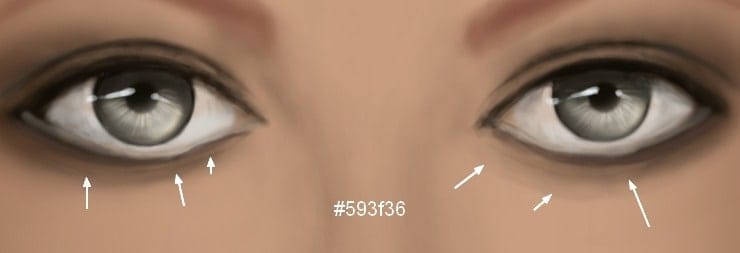
Create a new layer, use a soft brush with the color #593f36 to paint under the eyes and make some wrinkles:
from Photoshop Tutorials http://ift.tt/1GZns8A
via IFTTT


0 Comments