
Hi there. This tutorial will teach you how to create a set of weather icons in Adobe Photoshop. You will learn how to use and combine basic tools to create vector shape icons and how to have a perfect alignment using the Snap to Grid feature. Next, you’ll find out how to add effects via the Layer Style window. In the end, you will know how to create your own weather icons by applying these techniques and if you play with the Layer Style settings you can easily make your own unique design. Let’s get on!
What you will be creating

Tutorial Details
- Program: Adobe Photoshop CC
- Estimated Completion Time: 45 minutes
- Difficulty: Beginner-Intermediate
Step 1
Create a 600x600px document, go to View > Show > Grid to enable the Grid and then go to View > Snap To > Grid to enable the Snap to Grid. Hit Control + K to open the Preferences, go to Guides, Grid & Slices and enter the settings mentioned in the next image. The grid will make it easier for you to create the shapes.

Step 2
Concentrate on your Toolbar, fill the foreground color with #02C0D1 and select the Paint Bucket Tool. Move to your canvas and click there to change the background color.

Step 3
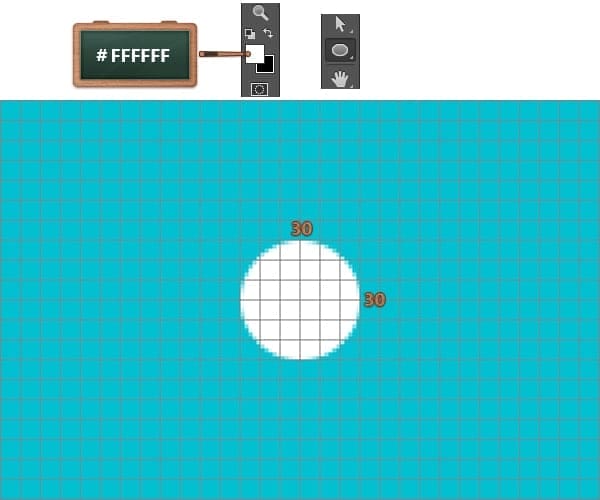
Change the foreground color to #FFFFFF and using the Ellipse Tool create 4 circles: 30x30px, 30x30px,35x35px, 20x20px.
Place them as you can see below.
Tip: Hold the Shift button from your keyboard to create a perfect circle.


Step 4
Use the Rectangle Tool to create a 15x35px vector shape and place it as shown in the image below.
Look inside the Layers panel, select the vector shape made in this step with the vectors shapes made in the previous step, right click on one of these shapes and click on Merge Shapes.

Step 5
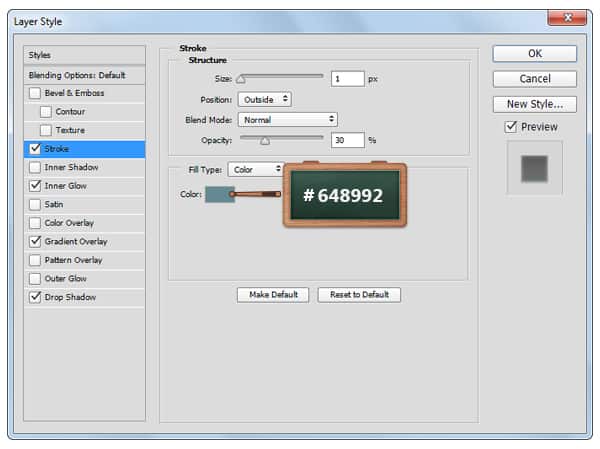
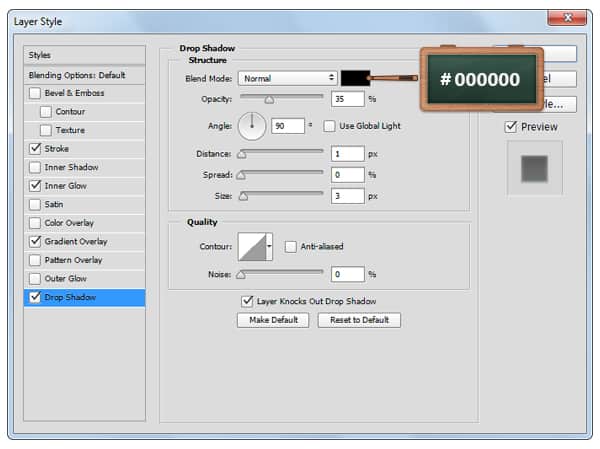
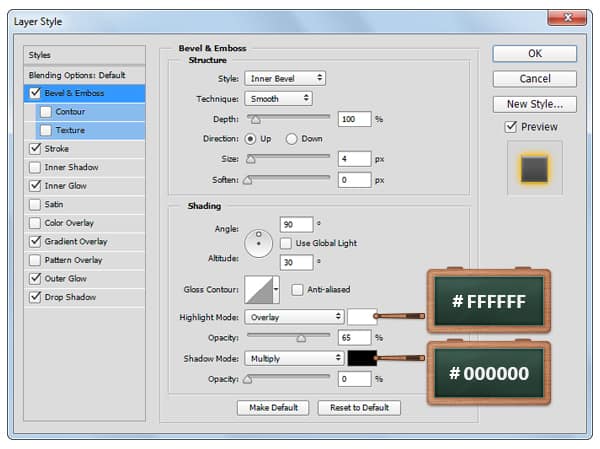
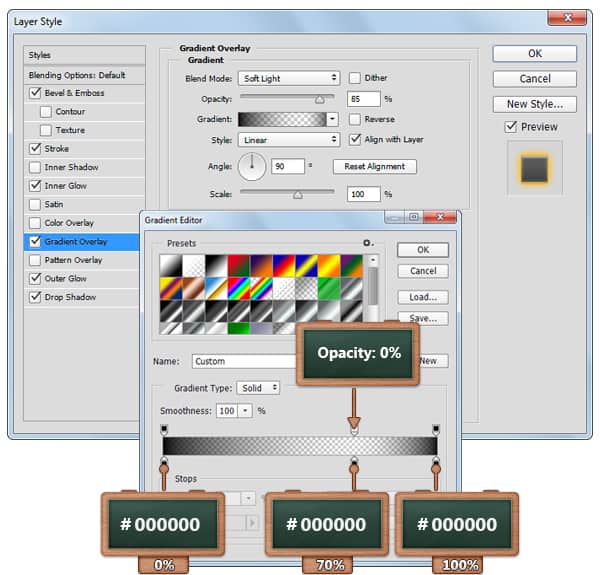
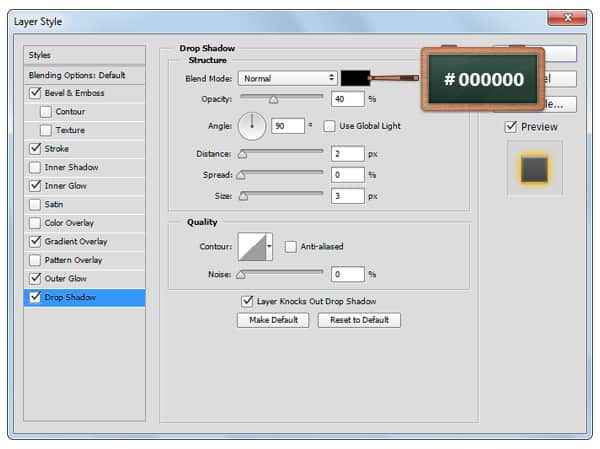
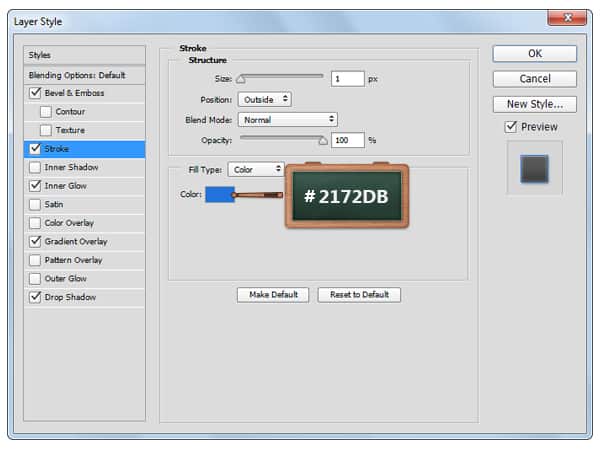
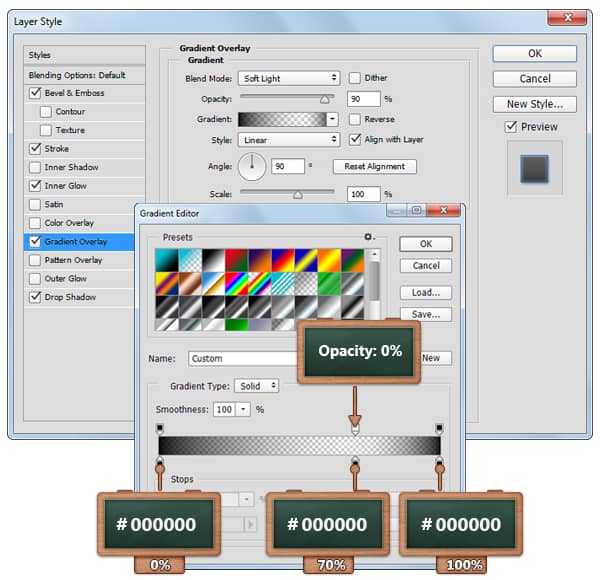
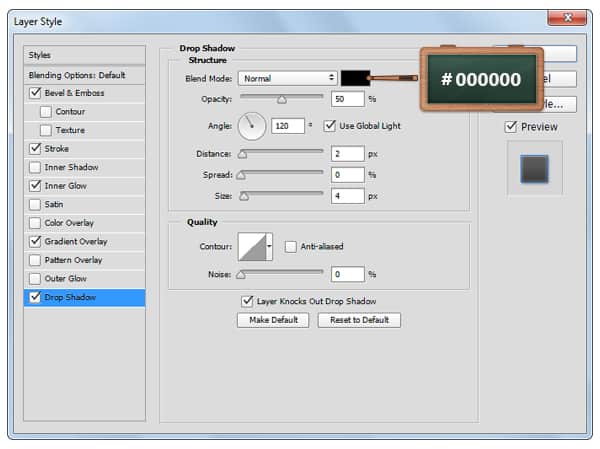
Look inside the Layers panel, double click on the name of the vector shape made in the previous step and rename it “Cloud” .
Now, double click on this vector shape to open the Layer Style window and enter the settings mentioned in the next images.
In the end, place this cloud in the upper left corner of your canvas, approximately as shown in the last image of this step.


Step 6
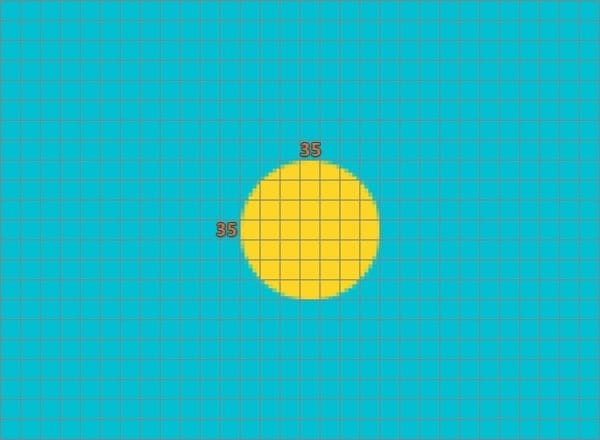
Change the foreground color with #FCD524 and use the Ellipse Tool to create a 35×35 px circle.
Step 7
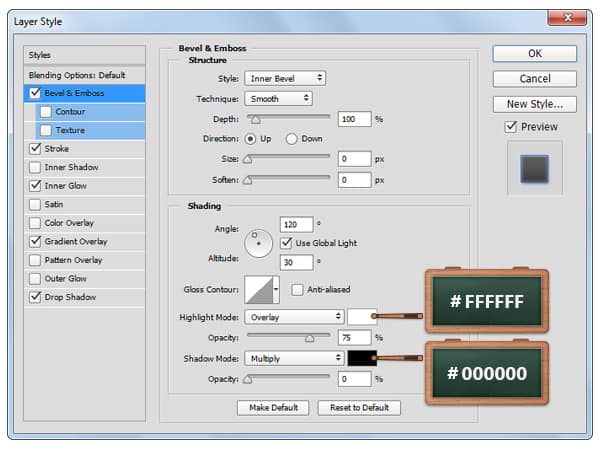
Rename the yellow vector shape made in previous step “Sun” .
Go to the Layer Style window for this vector shape and enter the settings mentioned in the next images.


Step 8
Now select the “Sun” vector shape and place it as shown in the image below.

Step 9
Select your “Cloud” and “Sun” vector shapes and duplicate them using the Control + J keyboard shortcut.
Look into the Layers panel and make sure that the “Sun” copy is below the “Cloud” copy.
Now, select these copies one by one, focus on your canvas and place the copies as you can see below.

Step 10
Make a new copy of your “Cloud” vector shape and place it as shown in the next image.
Look into the Layers panel and rename this new copy “RainyCloud” .

Step 11
To ease your work, you must change the grid to every 1px. Go to to Edit > Preferences > Guides, Grid & Slices and enter 1 in the Gridline Every box.
Switch the foreground color with #57DAFF, concentrate on the “RainyCloud” vector shape and use the Ellipse Tool to create a 4x4px circle.
Place it as shown below.

Step 12
Make sure that the vector shape made in the previous step is still selected and pick the Direct Selection Tool.
Select the top anchor point and press the Up arrow button from your keyboard twice.
Return to the Layers panel and rename the vector shape edited in this step “WaterDrop” .


Step 13
Duplicate (Control + J) your “WaterDrop” vector shape and spread the copies as shown in the next image.

Step 14
Look into the Layers panel, select one of your “WaterDrop” vector shape and then open the Layer Stylewindow to enter the settings shown in the next images.
Right click on this vector shape and go to Copy Layer Style then select all “WaterDrop” and go to Paste Layer Style.


from Photoshop Tutorials http://ift.tt/1FfIglO
via IFTTT

0 Comments